
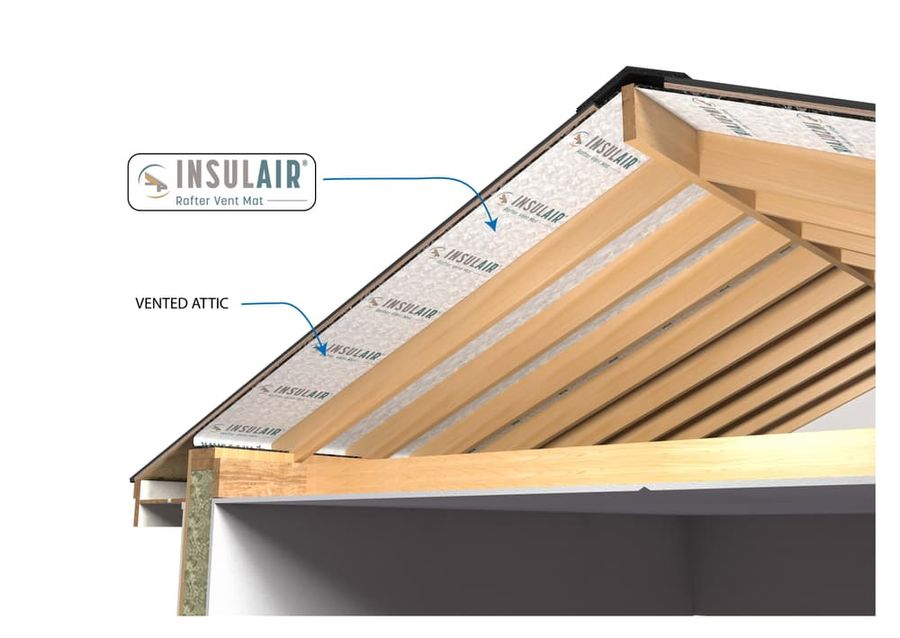
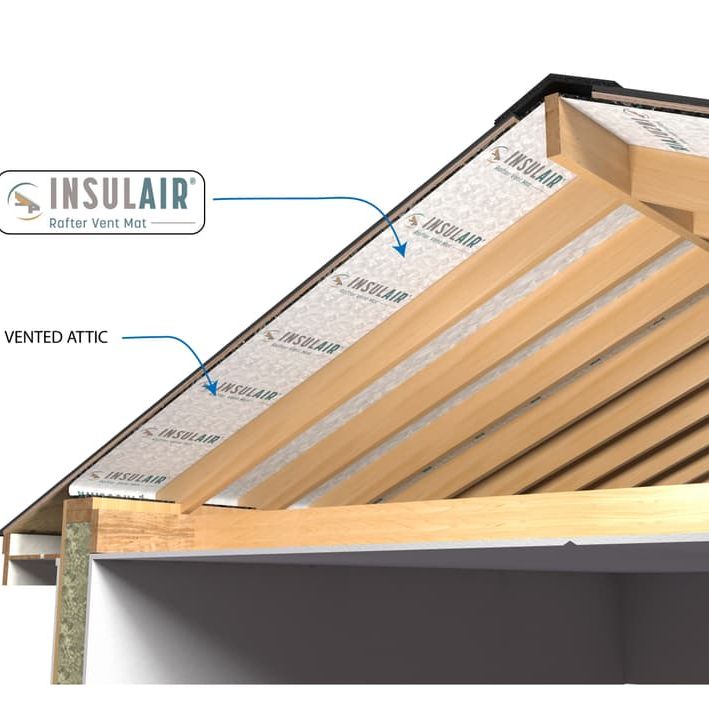
Insulair® creates a continuous 95% open air space between the roof deck and the spray foam insulation or between the roof deck and batt or spray foam in cathedral ceiling applications. Insulair® dries and vents the air preventing deterioration to the wood sheathing from condensation moisture common in these applications. Insulair® is applied to the interior side of roof assemblies in residential and light commercial construction. The product has an open filament waffle core design with filter fabric on the interior side to assure a clear vented path free of insulation intrusion. Insulair® is made with polymers that are stable and do not deteriorate when in contact with moisture.
Additional Information, Details, and Resources
1. Choose the proper width of Insulair®. The 14.5” wide roll is intended for 16” rafter spacing. The 22.5” wide roll is intended for 24” rafter spacing.
2. Start by fastening the Insulair® at the roof plate near the soffit vent. Fasten the Insulair® horizontally between the rafters with the fabric side facing up at this location.
3. Roll the Insulair® towards the soffit bending it in a “U” configuration up between the rafters towards the ridge vent. This creates an end dam with Insulair® which will avoid any wind washing ability when loose fill insulation is used in the attic space. Be sure the filter fabric is facing out and the entangled net is up against the underside of the roof deck.
4. Place the metal pins provided every few feet in a friction fi t fashion between the rafters to keep the Insulair® in place during installation.
5. Be sure to run the Insulair® from one side of the roof to the other. Do not terminate Insulair® at the ridge location for fear of the spray foam flowing out through the ridge vent during installation.
6. Once the spray foam is installed, the Insulair® will be permanently locked in place.


